


Start off by opening up the document you are trying to print in Word / Excel / Outlook / Acrobat Reader and either command (⌘) and “P” or by going to File > Print

Ensure your printer is selected and press the Copies and Pages drop down
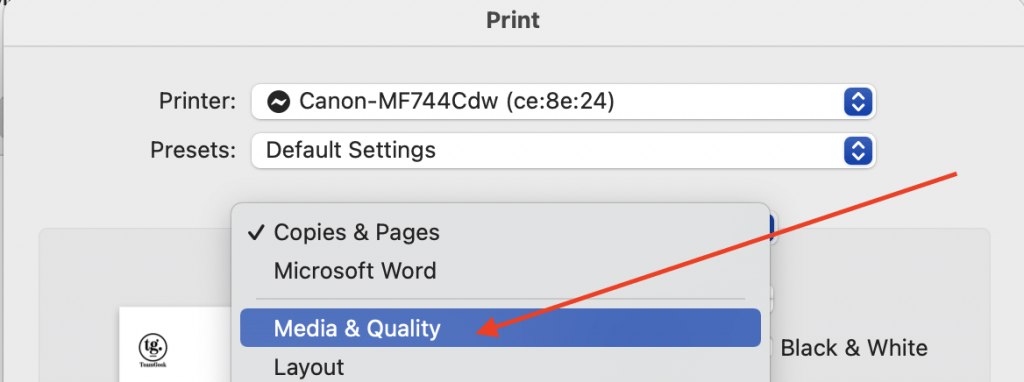
In the dropdown, choose “Media and Quality”
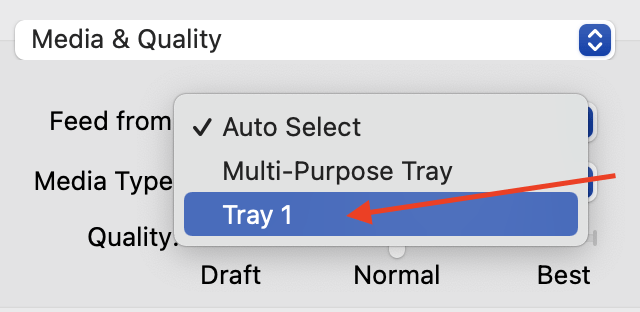
Select the “Feed From” drop down and pick the desired tray number

Select the Presets dropdown
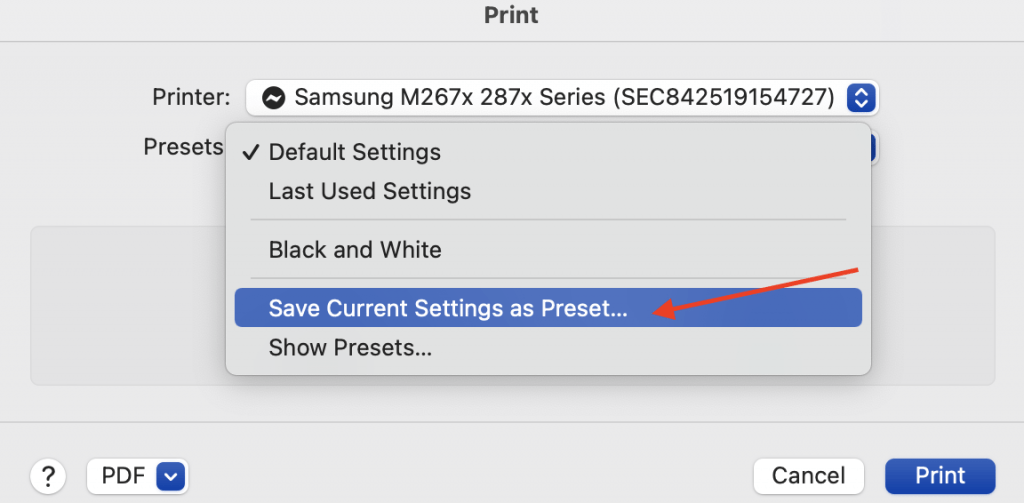
Save the current settings as a preset

Give the preset an easily identifiable name (e.g. Downstairs Office Tray 3)
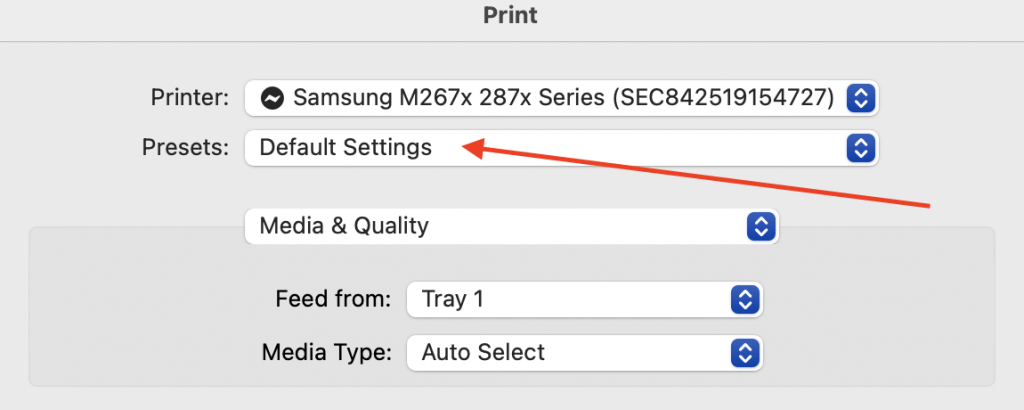

Now, whenever you need to flick between paper trays, you can click the “Presets” drop down and select the preset you just created.